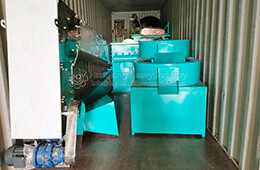
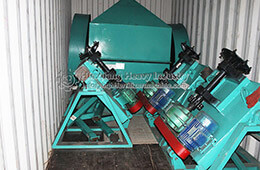
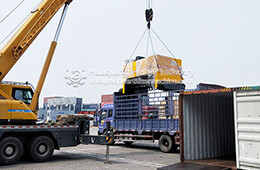
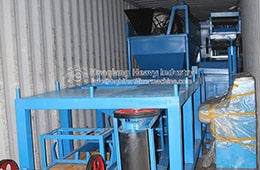
For the installation of the manure dryer of the organic fertilizer equipment, each part needs to be installed in place to ensure that there is no hidden danger in the production process of the equipment. The parts to be adjusted mainly include two sets of small wheels, large gears, installation and sealing of incoming and outgoing materials, etc. How to adjust the big and small gears when installing the manure dryer of organic fertilizer equipment?
1、 Installation of two small wheels of manure dryer for organic fertilizer equipment
After the two sets of small wheels are placed in position, the angle line must be aligned and the two ends of the line must be parallel. If there is a height error, it can be cushioned under the base and treated firmly. The two sides of each set of small supporting rollers must be horizontal. This is very important. It directly affects the stable operation of the whole stool dryer. The adjustment of the two apertures is the second important part after the small roller. First, adjust the left and right balance of the aperture, use the thread adjustment method or the thimble method to adjust by reference, and then adjust the roundness of the aperture. When adjusting, loosen the base plate at the symmetrical position first, and fix it tightly after adjustment. Spot welding can be carried out, and it is appropriate to fix it firmly. Secondly, the gap between the small roller and the large aperture should be uniform, which is mainly determined by adjusting the height and slope of the small roller.
2、 Adjustment of big gear of chicken manure dryer for organic fertilizer equipment
The adjustment of the big gear is the adjustment of the spring steel plate. The adjustment method is the same as the adjustment of the big aperture. The meshing of tooth surface is the key to adjust the big gear. First, the tooth surface should be evenly occluded and pay attention to the slope. Second, the distance between the tooth head and the tooth base is 6mm. The tooth surface should be adjusted evenly on both sides. Use a feeler gauge to check and press the lead wire to check. After the adjustment, the fixation should be completed by applying force and marking. The pinion base shall also be marked for inspection during production. The bridge base must be reinforced and fixed 100% firmly and marked around, and it can be checked once per shift.